The last couple of weeks have been rather busy. But I did find some time to work on the shave horse. As it turns out the vast majority of that time was in sharpening tools, a drawknife in particular.
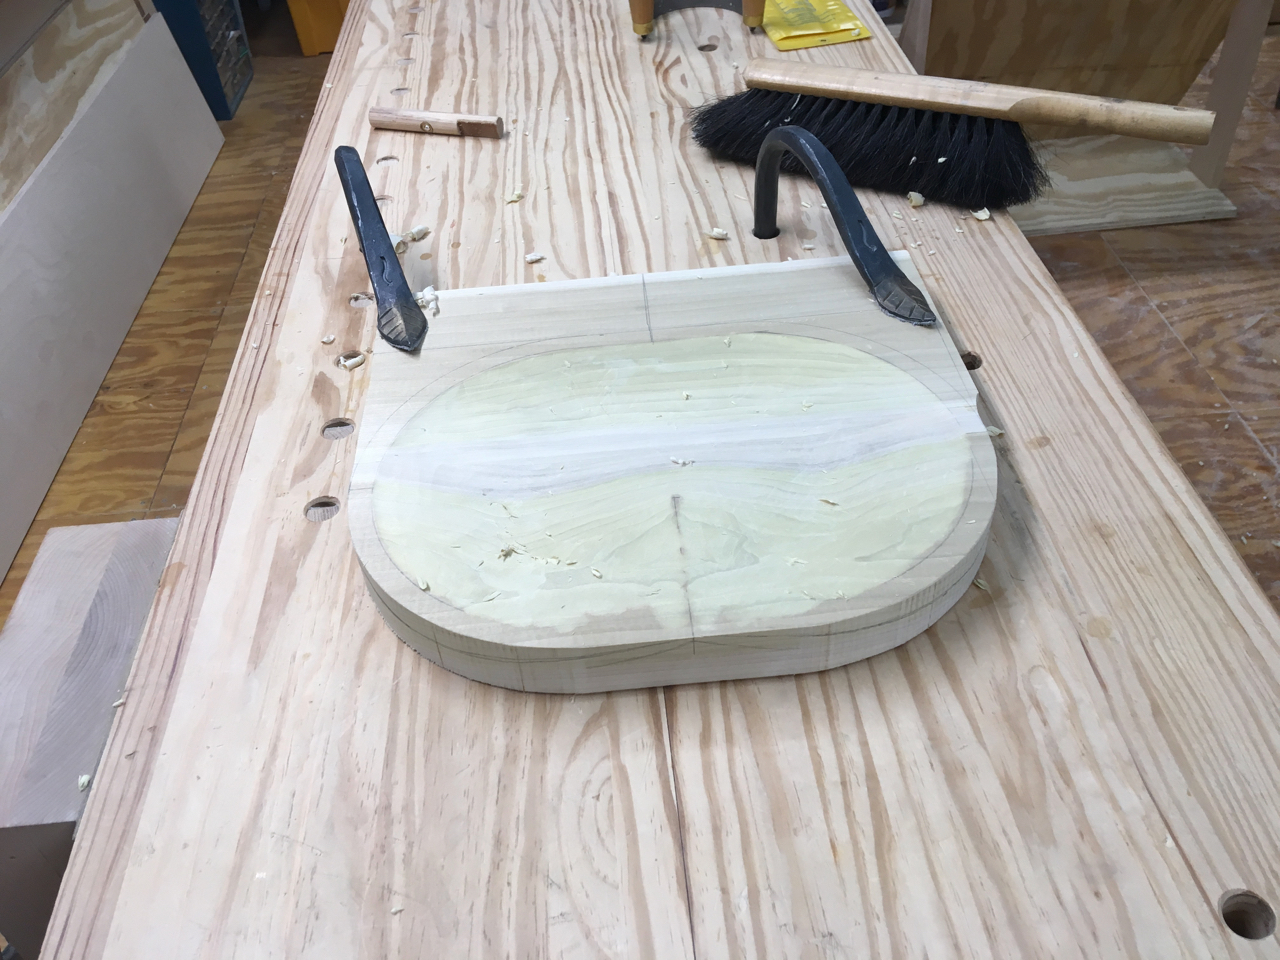
When I last wrote, the seat blank ‘bowl’ was carved, and I needed to cut the sweeps at the front to accomodate my legs as I sit on the seat.
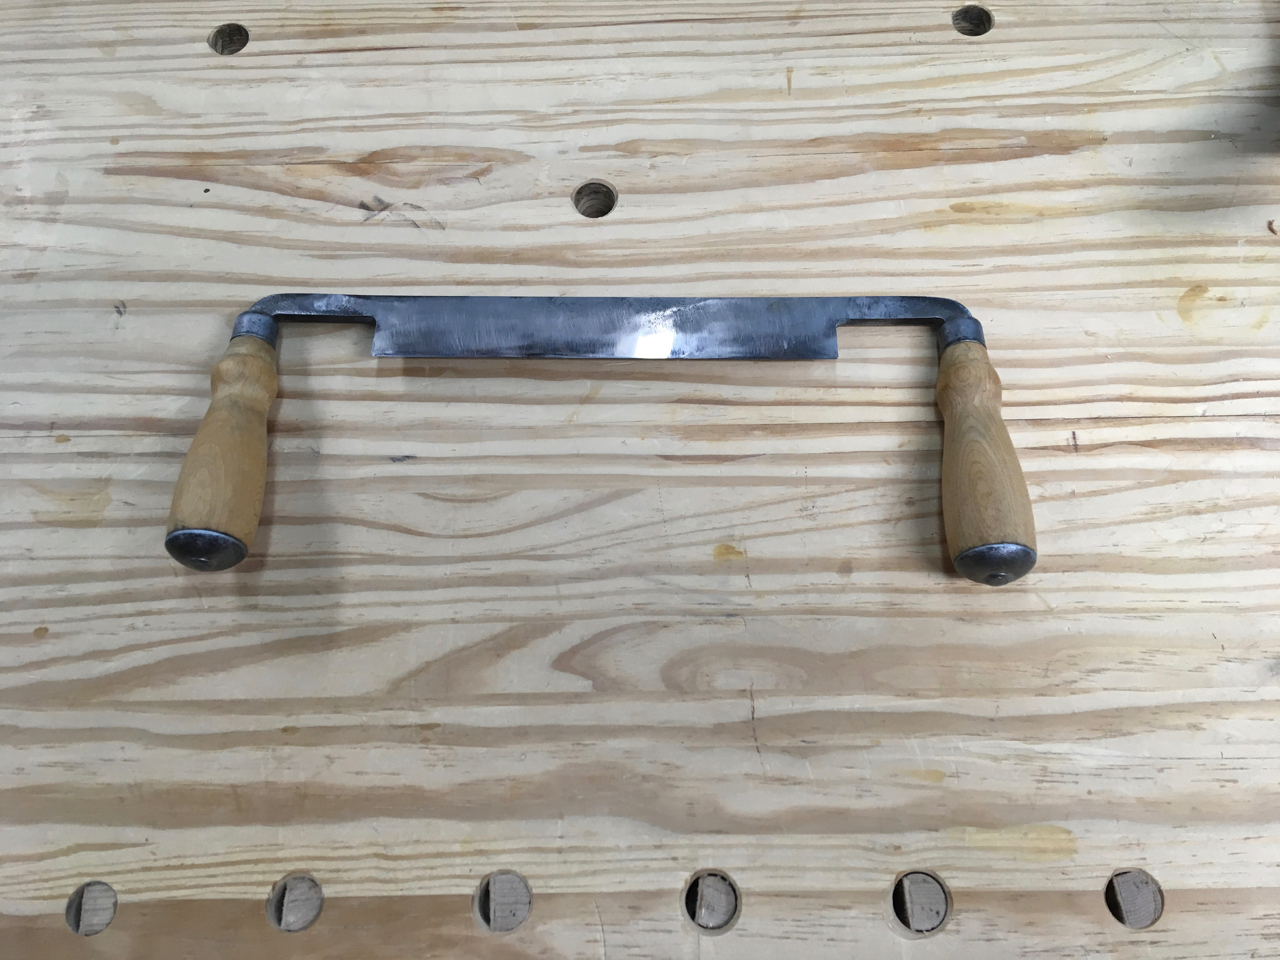
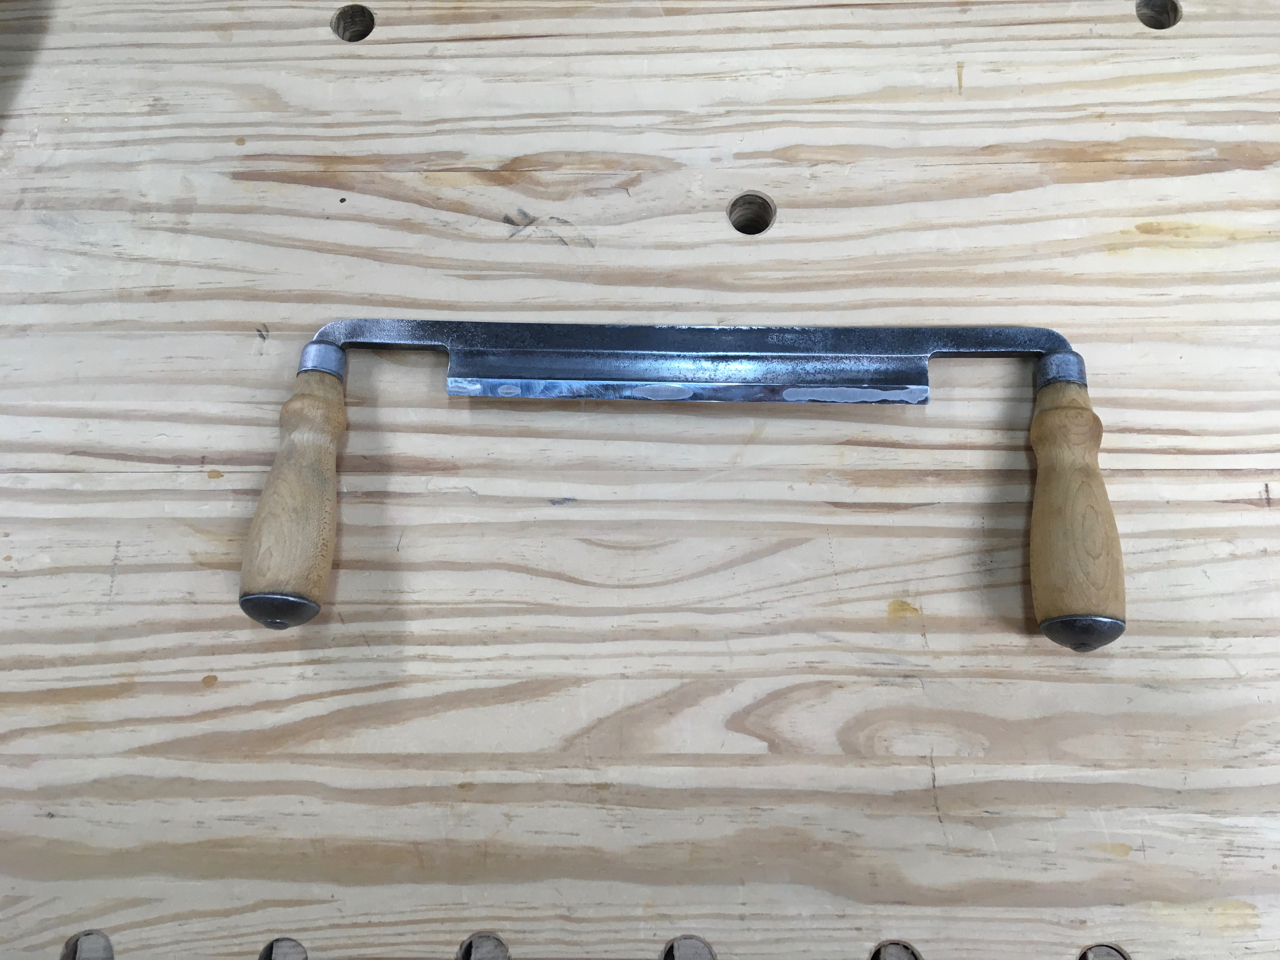
The efficient way to do this is with a sharp drawknife, but as I wrote I only had three dull ones. Seeing this as an opportunity to learn technique for cutting sweeps, I decided to sharpen a drawkinfe.
Learning about Drawknife Sharpening
I started making a jig to help me grind the blade of drawknives to create a hollow grind, but I was so enthused about making progress on the seat, I decided to go ahead and try creating a hollow grind on the back and front of a knife freehand (cue ominous music).
I picked my oldest and roughest looking drawknife, which was probably the right decision, since I had zero experience. But in hindsight I think it meant I persevered with a knife I probably should have abandoned.
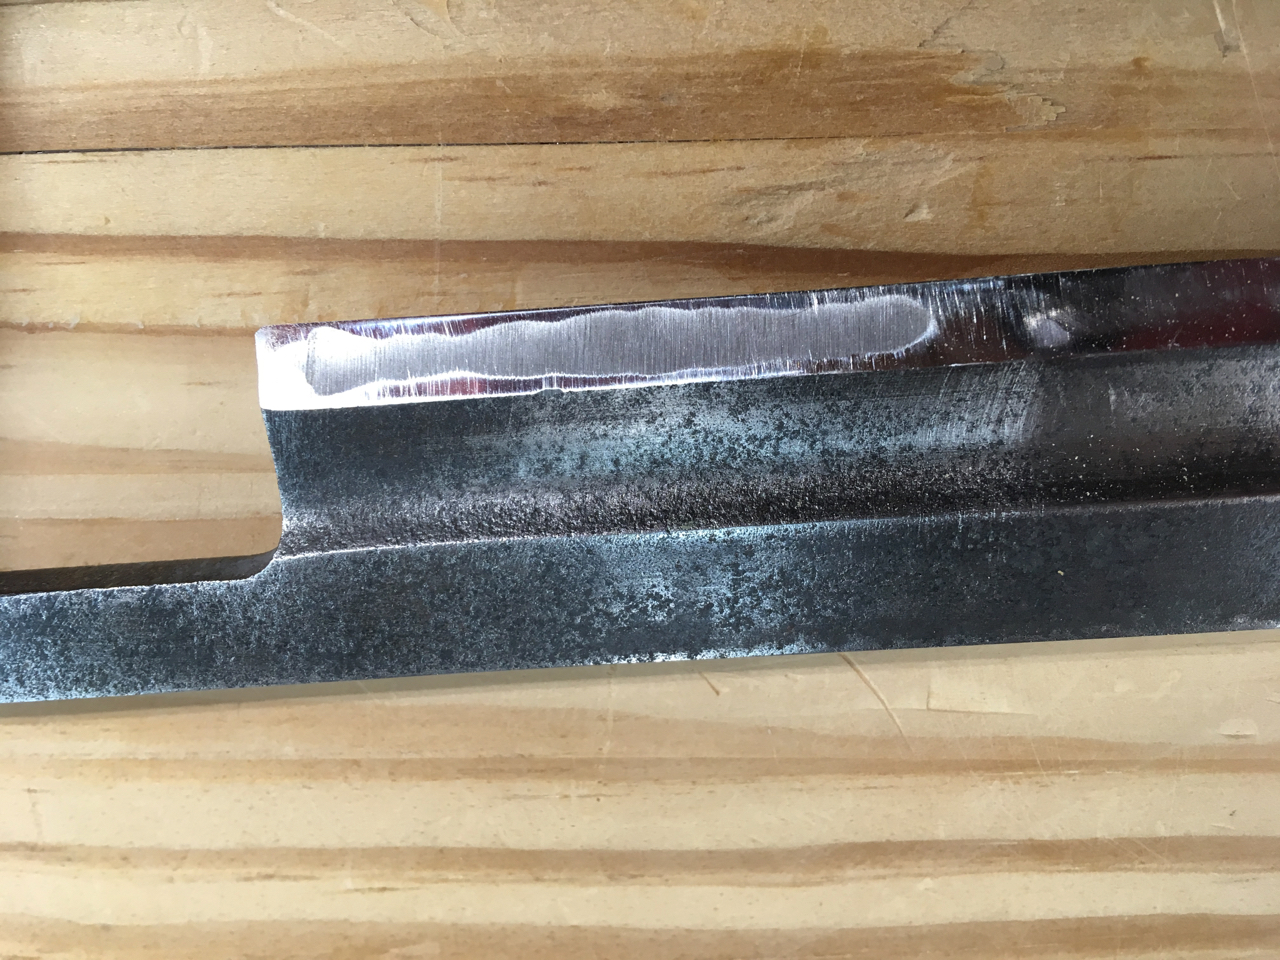
I don’t have many pictures, mostly because I didn’t realize what I was getting into. I created what I thought would be a good enough hollow grind on the back of the blade, with the idea it would speed sharpening by letting me just flatten the edge and a place much further away from the edge. The pitting was so bad I ended up removing the entire hollow grind by the time I was done. I won’t say how long it took, partly because I started at much too fine a grit, not realizing how much material I’d have to remove.
A long time later, I had a flat back, though you can see there is still pitting that I don’t believe will affect it’s performance.
I also hollow ground the front edge, again freehand. I thought I was good to go.

I suspect the freehand approach and my lack of skill is why some of the hollow grind was gone by the time I got the front edge sharp.
I also made myself take the time to clean up the handles with a thorough sanding and applied some finish to avoid dirt and grit getting into the wood.

Finishing the seat
After finally getting a drawknife sharp, I used it to carve the sweeps in the front of the seat.
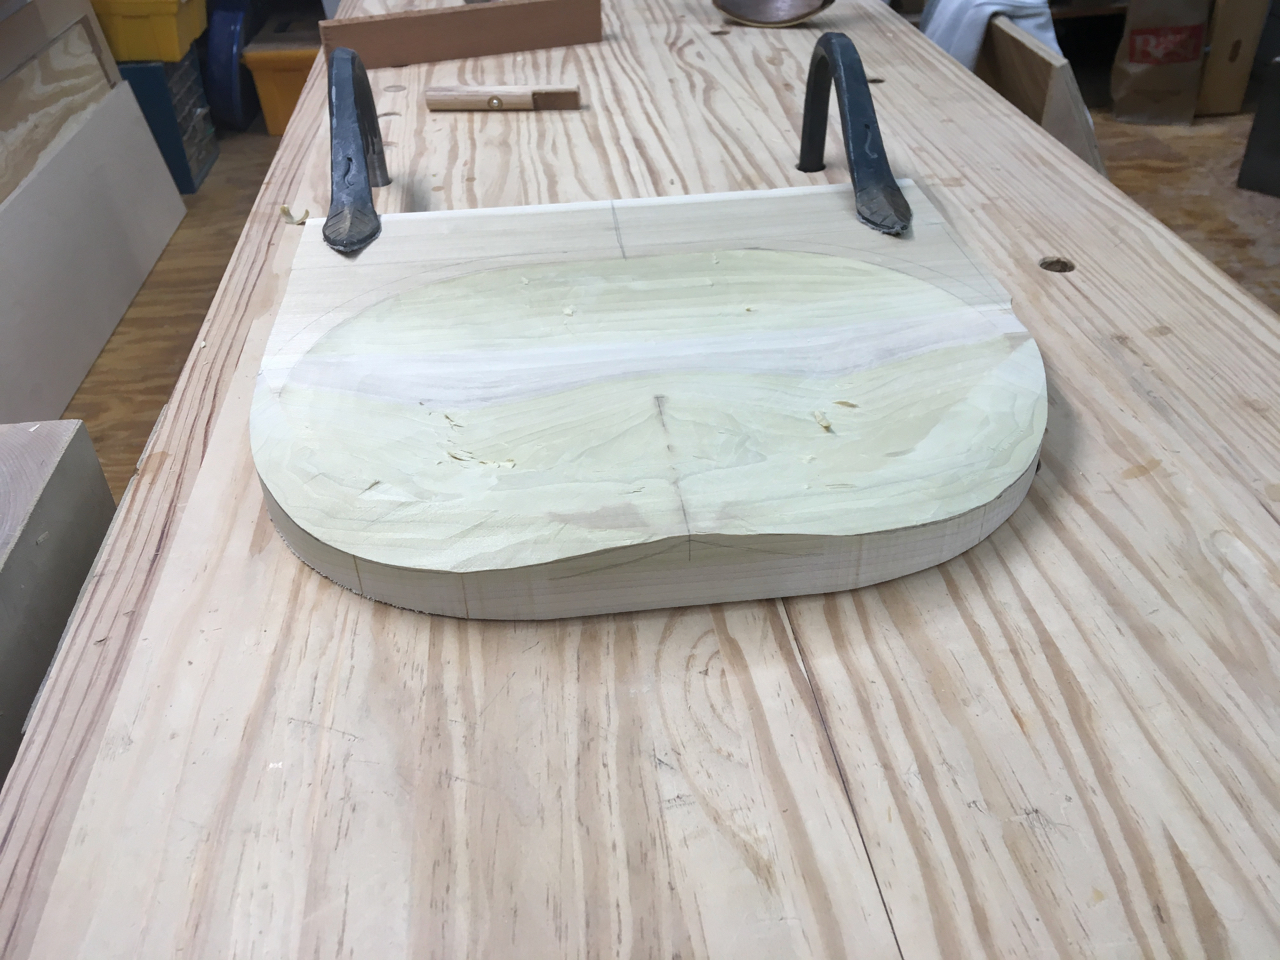
I then went back to the scorp to shape and blend the sweeps into the rest of the ‘bowl’.
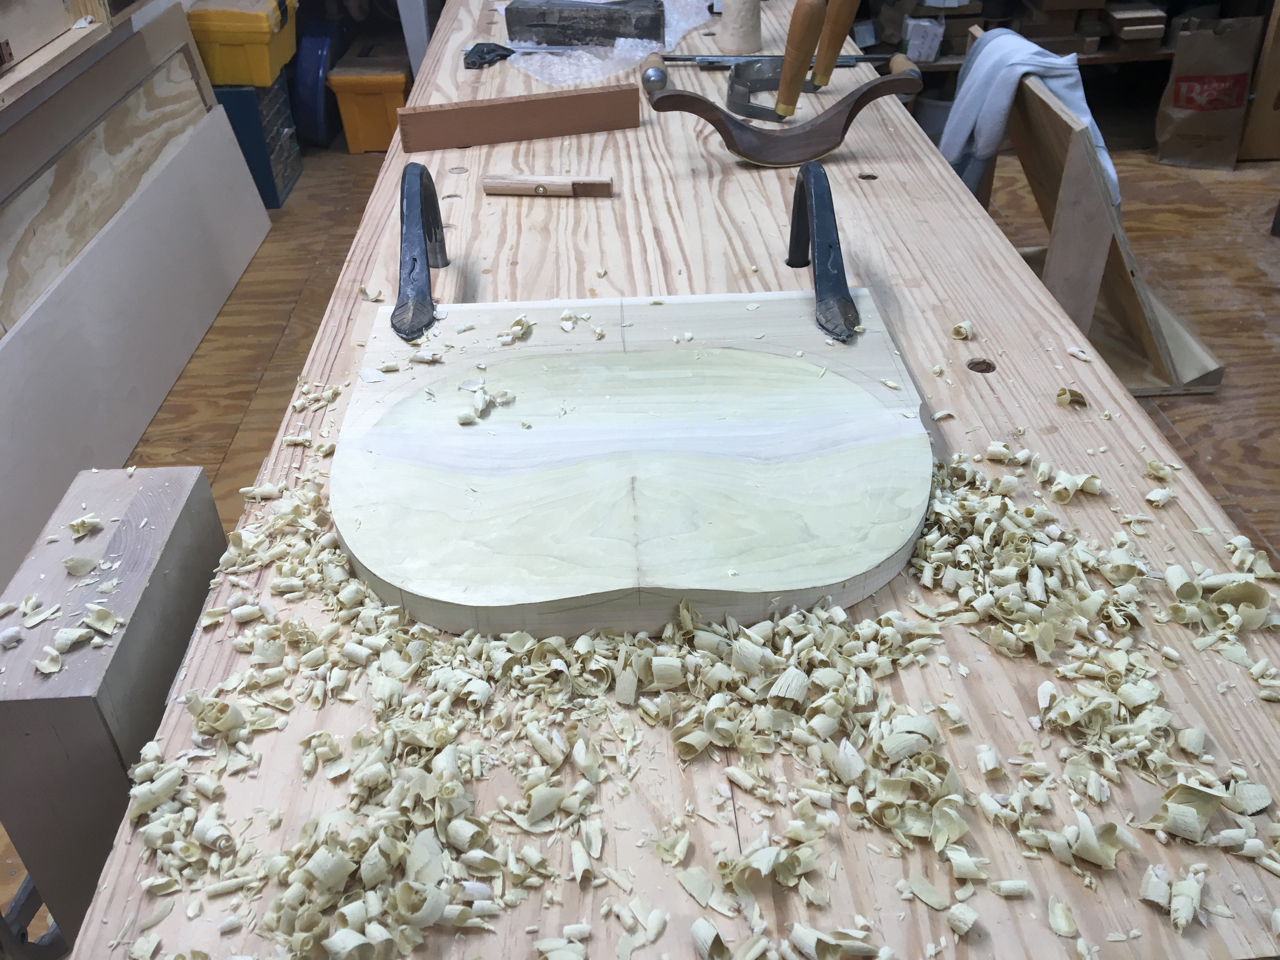
I also spent time learning about using a travisher, which was just as counterintuitive to use at first as I’d read (you tilt it forward to reduce/stop the cutting action). I also learned just how much you need to skew the tool to get it to cut cleanly. After some work with card scrapers, I had the seat essentially shaped. Life prevented woodworking for a few days, but today I found time to ease the ‘point’ at the center downward into the bowl to give a more comfortable shape, using scorp, card scraper, and finishing with sandpaper.
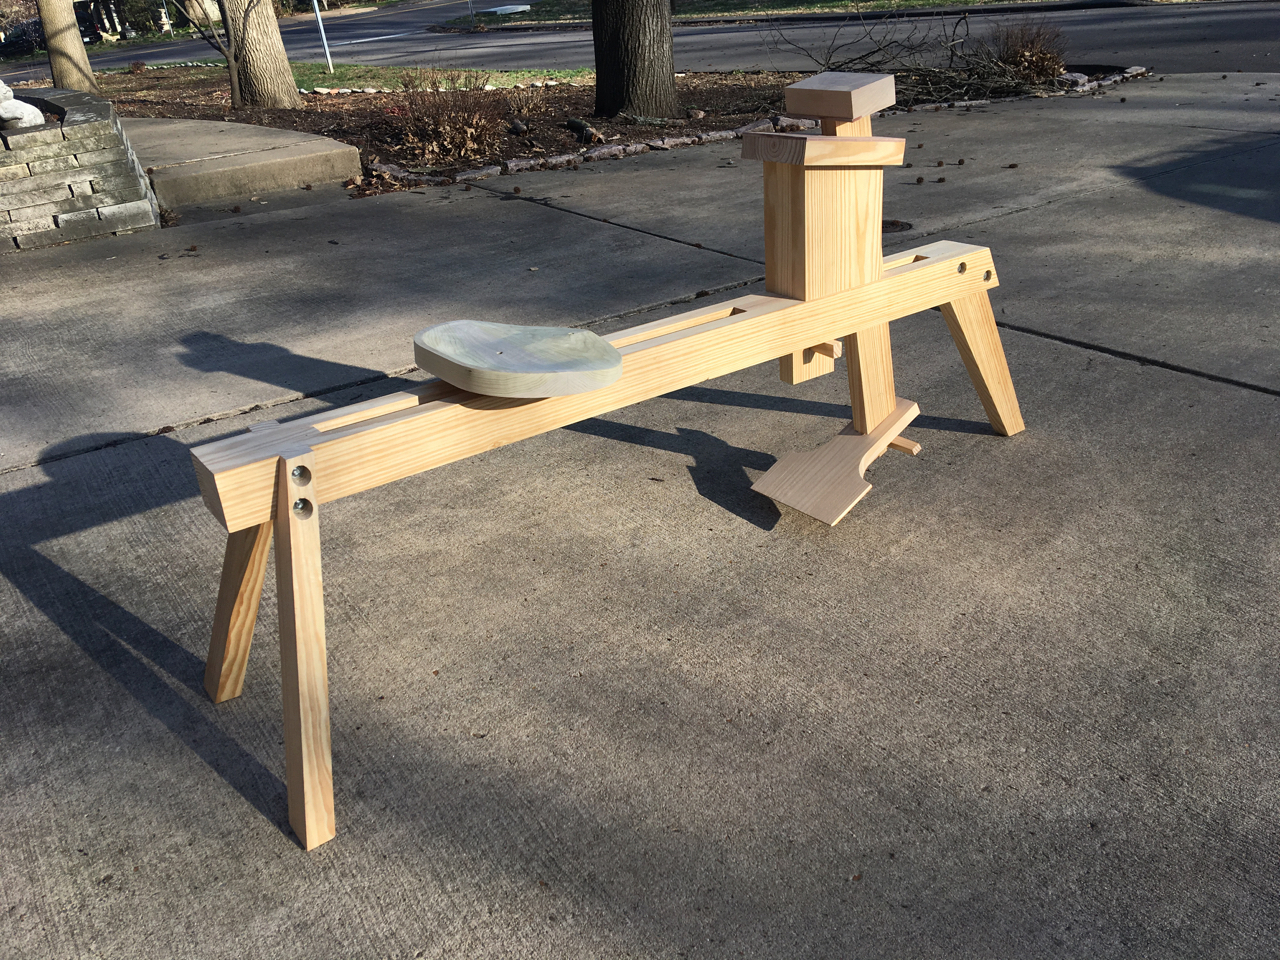
With the work requiring holdfasts complete, I cut the excess from the back of the seat, cleaned up the edges with my spokeshaves & sandpaper, and mounted the seat on the ‘fin’ that lets it slide along the two rails of the shavehorse with a friction fit. Happily, the seat fits well, and is quite comfortable.